
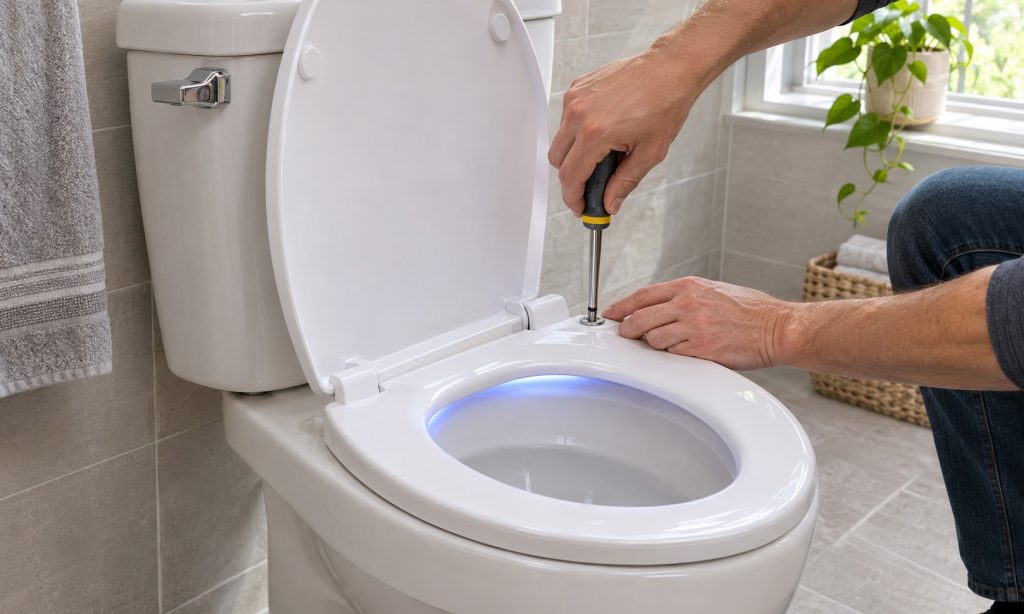
A bright bathroom ceiling light can feel excessive during a midnight visit. An illuminated toilet seat offers a softer point of reference, but installing it involves more than getting the LEDs to glow. The seat must fit, stay secure, and receive power in the way its manufacturer specifies.
Learning how to install a lighted toilet seat starts with identifying what you have: a battery-powered replacement seat, a plug-in heated seat, or a bidet seat with lighting. This guide focuses on the first two. A bidet adds plumbing work that requires its own instructions.
The basic sequence is straightforward: check compatibility, remove the old seat, prepare the mounting surface, attach and align the replacement, then activate and test it. Keep the exact model’s manual beside you throughout the job.
Before You Begin: Identify the Seat and Power Source
Before deciding how to install a lighted toilet seat, check its label and paperwork. A separate clip-on bowl light is a different accessory; it does not require replacing the seat.
Battery-operated seats can provide lighting without a cord. Their operating schedules vary: published specifications include both seven-hour and ten-hour daily lighting cycles. That difference matters when testing a newly installed seat. “Automatic” does not necessarily mean motion-activated.[1][2]
A plug-in heated seat combines separate functions. Its light may work differently from its heating controls, and installation requires suitable electrical access. Do not assume that instructions for a battery model apply to it.[3]
I would identify the power arrangement before unpacking the hardware. Discovering that you need electrical work after removing the only usable seat in the house is an avoidable inconvenience.
Check That the Replacement Seat Fits
A useful guide to how to install a lighted toilet seat must start with the toilet underneath it. If compatibility is uncertain, read our guide to whether lighted toilet seats fit all toilets before continuing.
Compare the bowl and mounting dimensions
Match the replacement to the bowl’s round-front or elongated shape. Use the measurement endpoints shown on the replacement’s drawing; overall seat length and bowl measurements are not automatically interchangeable.
Record the distance between mounting-hole centers, bowl length, and bowl width. Then compare each measurement with the manufacturer’s requirements. A familiar shape is a useful starting point, not confirmation by itself.
Look behind and beneath the hinges
Check whether you can reach the underside fasteners. Some seats fasten from above, while others require access below. Also check space for the housing, opening lid, and battery servicing.[2]
Before proceeding, ask yourself whether an existing bidet attachment or accessibility accessory occupies that same space. Obtain compatibility confirmation for the combined arrangement. Do not improvise a stack of spacers merely to make the bolts reach.
Gather Tools and Prepare the Work Area
Preparation makes learning how to install a lighted toilet seat much less awkward. Lay out the supplied parts on a towel and compare them with the illustrated parts list.
Depending on the fasteners, you may need:
- A correctly sized screwdriver.
- A small adjustable wrench for accessible nuts.
- A tape measure and flashlight.
- Gloves, soft cloths, and an approved cleaner.
- The specified batteries, if required.
Use the manual to settle the tool list. Do not assume every seat needs every item above.
Keep children away from loose hardware and batteries. Clear the floor so you can work without twisting around a trash can or cleaning bottle. Place removed parts in a container instead of balancing them on the tank.
My preference is to photograph the old mounting arrangement before taking it apart. The image can help explain an access problem to support, although it should not replace the new seat’s assembly diagram.
How to Install a Lighted Toilet Seat Step by Step
The following sequence organizes the job. Your model’s instructions control the actual assembly order, including whether batteries go in before mounting.
1. Remove the existing toilet seat
Disconnect any electrical supply to the old seat before handling it, following its instructions. For an ordinary seat, identify the hinge covers and fasteners without prying blindly.
If bolts pass through to accessible nuts, hold the appropriate part while loosening its counterpart. If the existing seat uses a release mechanism, consult that mechanism’s instructions first.
Lift the seat away carefully once it is free. Do not use the ceramic as a leverage point. If hardware spins, is badly corroded, or refuses to release, pause and identify the fastening system. Applying more force without understanding it can turn a seat replacement into a toilet repair.
2. Clean and inspect the mounting surface
Remove residue from the exposed mounting area with a cleaner suitable for the toilet’s finish. Follow the cleaner’s directions, then leave the surface clean and dry.
Inspect around the holes before covering them again. Stop if you find a crack or other damage that could affect mounting. New hardware should not conceal an unresolved problem.
Keep the replacement’s electrical parts away from cleaning liquids. This is also a convenient moment to check that no old washer or spacer remains stuck to the bowl.
3. Assemble the supplied mounting hardware
Compare each fastener with the manual’s illustration. Separate old hardware from new so similar-looking pieces do not become mixed together.
For an underside-mounted design, use the specified bolts, washers, and nuts in the illustrated order. For a top-mounted design, follow the instructions for its anchors or mounting assembly. Do not substitute one procedure for the other.[2][4]
Start threads carefully. If a fastener will not engage normally, stop and check its orientation and identity. The goal is correct assembly, not winning an argument with a screw.
4. Align the seat before final tightening
Position the ring over the bowl and inspect it from above. Check the front edge, both sides, and the rear housing rather than judging alignment from one angle.
Use only the adjustment provided by the mounting system. If permitted, leave the hardware slightly loose while positioning, then complete the specified tightening procedure.
There is no universal torque value for how to install a lighted toilet seat. Follow the instructions for your actual hardware. Avoid a powered driver unless explicitly permitted, and do not keep tightening to compensate for an unexplained wobble.
5. Secure any release mechanism and check movement
If the seat detaches for cleaning, confirm that its latch or locking mechanism is engaged. A seat resting over its mounts is not necessarily locked onto them.
Raise and lower the ring and lid. Check for contact with the tank or housing and inspect the intended support points. Investigate movement before anyone uses the seat.
FYI, a quick-release feature is useful only when you also know how to secure it again. Read that part of the manual now, rather than discovering it during the next cleaning session.
6. Activate the light using the correct procedure
For battery models, use the specified battery type and follow the polarity markings. Close the compartment as directed without forcing it. Do not copy a battery count from another model.[4]
For plug-in models, complete the mechanical installation before connecting power unless the manual instructs otherwise. Keep the cord clear of moving parts and use the required electrical supply.[3]
Find the lighting instructions separately from the mounting instructions. Record any timer setup or brightness sequence so another household member can adjust it later.
Electrical Checks for Plug-In Seats
If your question is how to install a lighted toilet seat that also heats, resolve the electrical requirements before using it. Follow its stated voltage, circuit, grounding, and outlet-location requirements. Do not remove a grounding prong or use an extension cord where prohibited.[3]
GFCI protection helps protect people from severe electrical shock. The Consumer Product Safety Commission advises testing GFCIs after installation, monthly, after a power failure, and according to their instructions.[5]
Have a qualified electrician address a missing or unsuitable outlet. A receptacle accepting the plug does not establish that the installation meets the seat’s requirements.
Do not use a seat with a damaged cord or plug. If protection repeatedly trips, stop using the equipment and obtain qualified help instead of repeatedly resetting it.
Test the Installation Before Calling It Finished
Testing is part of how to install a lighted toilet seat, not an optional extra. Start with the mechanical checks while the bathroom is well lit.
Confirm that the seat stays centered, the lid moves freely, and the release mechanism remains locked. Check that controls and battery access are usable without straining the assembly.
Then test the lighting under its intended conditions. A low-light sensor may prevent illumination in a bright room; a timer-controlled model may follow its programmed schedule.[1][2][3]
Make one adjustment at a time. If you change batteries, timing, and mounting position together, it becomes harder to identify what solved the problem.
Finally, check the bathroom at night with the usual door position. Decide whether the glow is comfortable and whether you still need separate lighting for the route to the bathroom.
Troubleshooting After Installation
When reviewing how to install a lighted toilet seat after a problem appears, separate mechanical faults from lighting behavior. That keeps a dark LED from sending you back to the mounting bolts unnecessarily.
| What you notice | What to check |
|---|---|
| Seat shifts sideways | Correct hardware, alignment, locking mechanism, and tightening procedure |
| Lid hits the tank | Clearance and allowed adjustment range |
| Light stays off | Power supply, controls, and activation conditions |
| Light operates at an unexpected time | Timer instructions and any required reset |
| Battery cover will not close | Battery orientation, placement, and specified assembly order |
Do not force a battery housing or modify a mounting bracket. If the manual’s checks do not resolve the fault, send the manufacturer the model number, photographs, and a concise description.
For example, “the lid touches the tank before fully opening” is more useful than “it does not fit.” Specific observations help support distinguish a compatibility problem from an assembly issue.
Keep the Seat Clean and Serviceable
Keep liquids away from the battery pack. For plug-in seats, observe the manual’s cleaning precautions, including disconnection where directed. Do not spray or soak the electrical housing.[3][4]
Use only cleaners and methods approved for the seat’s materials. Keep the model number and manual somewhere accessible, especially if a cleaning latch or battery tray has an unfamiliar release.
After removing and reinstalling the seat for cleaning, check that it is locked and stable. Note the lighting settings before changing batteries so you can restore them if needed.
Frequently Asked Questions
These questions address practical uncertainties that can remain after the mounting steps are clear.
Can a beginner learn how to install a lighted toilet seat?
Yes, a compatible seat with accessible hardware may be a manageable project. Stop when damaged parts, uncertain mounting, or unsuitable electrical access takes the job beyond the supplied instructions.
Do I need to shut off the toilet’s water?
Replacing an ordinary seat without disturbing plumbing does not require opening the water supply. A bidet seat is different: follow its separate plumbing procedure, including the required water shutoff.
Does every illuminated seat need an outlet?
No. Battery-powered models exist. Verify your model’s power source rather than assuming all lighted seats use household electricity.[1][2]
How long should I allow for installation?
Allow time to read the manual, check fit, and test operation. Avoid relying on a fixed time estimate: inaccessible hardware or electrical work can change the scope substantially.
Can I reuse the old bolts?
Use the supplied or explicitly approved hardware. Similar appearance does not confirm suitable dimensions or compatibility with the new mounting system.
Final Words
Knowing how to install a lighted toilet seat means getting the fit, fastening, and power arrangement right before enjoying the light. Work through the model’s instructions, check alignment carefully, and test the completed installation.
My advice is to prioritize a secure, serviceable seat over finishing quickly. Keep the manual, learn the controls, and resolve any wobble or electrical concern before regular use.
References
These technical sources document model differences and safety considerations; they are not product recommendations.
- Battery-powered nightlight seat specification sheet — example of a seven-hour lighting cycle.
- Top-mounted nightlight seat specification sheet — example of top mounting and a ten-hour cycle.
- Heated seat with nightlight installation instructions — model-specific electrical requirements and controls.
- Battery-operated seat installation guide — mounting, battery orientation, and operating instructions.
- US Consumer Product Safety Commission: GFCI fact sheet — electrical protection and testing guidance.