So, your shower water smells like it’s straight out of a public pool, and your hair’s staging a silent protest. Sound familiar? Yeah, I’ve been there. That’s exactly why I became mildly obsessed (okay, fully obsessed) with shower filters.
Installing a shower filter isn’t rocket science. In fact, it’s one of those DIY upgrades that makes you feel like a plumbing god—without needing an actual toolbox full of intimidating gadgets. Whether you’re battling hard water, chlorine, or mystery minerals that have no business touching your skin, this guide’s got your back.
FYI, if you’ve ever Googled things like “Shower head filter for hard water” or “How to replace shower filter cartridge”, you’re in the right place. Let’s get your shower situation sorted.
How to Install a Shower Filter
Installing a shower filter is a simple yet effective way to improve your water quality. This quick DIY project helps protect your skin, hair, and overall health.
Step 1: Gather Your Tools and Materials
Don’t worry—you’re not assembling IKEA furniture. Here’s what you need:
- A shower filter (duh)
- Teflon tape (also known as plumber’s tape)
- Adjustable wrench (or your bare hands if you’ve been hitting the gym)
- Old rag or towel (unless you enjoy cleaning up puddles)
Bonus points if you grab a YouTube video to watch along—because why not multitask?
Step 2: Prepare Your Shower Area
Turn off the water and make sure your shower is dry-ish. Put down a towel or cloth so you don’t lose tiny parts down the drain (because they will try to escape). You’ll thank me later when your hairpin doesn’t vanish into the abyss.
Step 3: Rinse Your New Shower Filter
Wait, rinse it before using it? Yep. Most filters come with carbon dust inside that you definitely don’t want in your first shower. Just run water through the filter for a few minutes per the manufacturer’s instructions.
Fun fact: that black stuff in your first flush? Totally normal. No, your shower isn’t haunted.
Step 4: Remove the Existing Shower Head
Grip the showerhead and twist it counter-clockwise. If it’s stuck (which it probably is), wrap it in a cloth and use your wrench.
Pro tip: Don’t Hulk-smash it. Gentle pressure works wonders.
This is usually when you discover just how long it’s been since you cleaned behind your showerhead.
Step 5: Apply Thread Seal Tape
Wrap the threads of your shower arm with Teflon tape. Do it in the same direction that you’ll screw on the filter. This keeps things watertight and prevents annoying drips.
Honestly, this stuff is like the duct tape of plumbing—never underestimate its power.
Step 6: Remove Plastic/Sealant from Filter Cartridge
Most cartridges come sealed to keep them fresh. Peel off any plastic or stickers before installation. Because yeah—plastic wrap doesn’t magically dissolve in water.
You’d be surprised how many people forget this step and then wonder why their water pressure feels like a gentle mist.
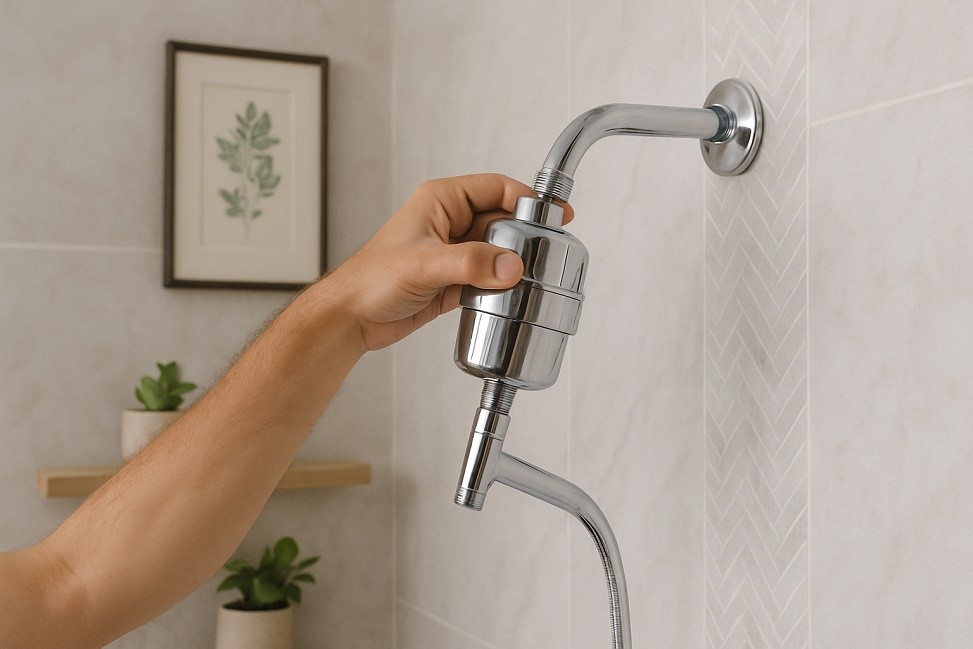
Step 7: Attach the Shower Head Filter
a) Inline Water Filter Installation:
- Screw the inline shower filter directly onto the shower arm.
- Tighten by hand. Use a wrench only if you want to pretend you’re fixing a spaceship.
- Then screw your original showerhead onto the end of the filter.
b) Filtered Shower Head Installation:
- If your filter comes as part of a new showerhead, just screw it onto the shower arm.
- Again, tighten by hand. No need to go full torque.
Step 8: Check for Leaks
Turn on the water slowly and inspect all connections. See any drips? Tighten a bit more or add another layer of Teflon tape. No shame—it happens to the best of us.
Leaks are like your ex: if ignored, they’ll come back worse.
Step 9: Adjust the Shower Head Angle
You don’t want your new spa-like stream spraying straight into the wall, right? Adjust the angle to suit your height and preferences. Go wild—this is your time to shine.
Bonus tip: angled slightly downward means fewer puddles on your bathroom floor. You’re welcome.
Step 10: Enjoy Your Clean, Filtered Shower
Step in, lather up, and bask in the glory of chlorine-free, mineral-balanced water. Your skin and hair might throw you a thank-you party. Seriously.
It might be all in your head, but filtered water does feel fancier. No judgment if you start singing like Beyoncé.
Step 11: Replace Your Filter at Least Once Every 6 Months
Set a reminder on your phone, because you will forget. Trust me. Most filters need replacing every 6 months or after 10,000 gallons, whichever comes first.
Think of it like flossing—skipping it seems fine until stuff starts going south.
How to Install a Shower Filter Cartridge Replacement
- Unscrew the filter housing (usually by hand)
- Remove the old cartridge (it might be a bit gross—brace yourself)
- Insert the new cartridge, making sure it’s seated properly
- Screw the housing back on
- Run water through the new filter for a few minutes to flush out dust
Boom. You’re back in the game.
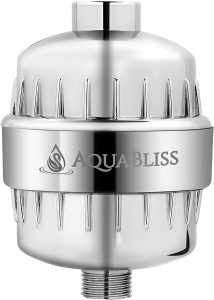
Overall Best Shower Filter
Alright, IMO the AquaBliss High Output Revitalizing Shower Filter is a crowd-pleaser. It tackles hard water, chlorine, and even weird smells like sulfur (yep, that’s a thing). Plus, it’s super easy to install.
Other honorable mentions:
- Berkey Shower Filter – Great if you’re anti-chlorine.
- Culligan WSH-C125 – Classic filtered showerhead that’s budget-friendly.
- AquaHomeGroup 15-Stage Filter – Extra filtration for the overly cautious (me included).
Each one reduces mineral deposits and improves hair and skin feel—aka no more crunchy ends or itchy skin.
Top Reasons You Need a Shower Filter
Water Quality and Health
- Chlorine dries out your skin and hair (aka your glow-killers)
- Hard water causes buildup—on your scalp, your fixtures, your soul (kidding, kind of)
- Sensitive skin? Filters help reduce irritation and flare-ups
- Color-treated hair? Say goodbye to fading and brassiness
- Cleaner showers = less scrubbing gunk from tiles and glass
Also? Peace of mind. You can’t see what’s in your water, but your skin definitely notices.
Additional Tips and Considerations
Let’s face it: when you’re installing something as vital as a shower filter, you don’t want to skip any steps (or misstep along the way). Here are some tips to help smooth out the process:
- Check Compatibility
Not all shower filters are designed for every shower setup. Whether you’ve got a handheld, fixed, or rain showerhead, make sure the filter you’ve chosen fits. Always check the product specifications to avoid frustration (and that “oops” moment when you can’t screw it in). - Tighten, But Don’t Overdo It
You might be tempted to really tighten things down with the wrench to ensure no leaks, but here’s the thing: over-tightening can lead to stripping threads or damaging parts. Tighten firmly, but not so much that you’re giving your shower head the Hulk treatment. - Keep the Filter Accessible for Future Replacements
If possible, don’t bury the filter too far into the wall or behind difficult-to-remove components. You want to make future replacements easy to access. Remember, filters should be replaced regularly, so make sure you won’t need a crowbar just to get to it!
Common Mistakes to Avoid
Now, even the best of us can make a mistake or two (or ten). Here are some of the most common slip-ups people make while installing a shower filter—so you can avoid them!
- Forgetting to Rinse the Filter
This one’s a biggie. I’ve seen many people install their filter only to wonder why their water smells… off. If you forget to rinse it beforehand, you could end up with carbon dust (yes, that’s a thing) floating around in your first shower. Yuck. So take the few minutes to do it right. - Skipping Teflon Tape
Oh, Teflon tape—don’t skimp on this! If you skip this crucial step, leaks are inevitable. Water will find any gap it can. Trust me, your bathroom floor doesn’t need any more puddles. - Not Turning Off the Water Supply
Sounds like a “no duh” moment, but I’ve seen people try to install filters while the water’s still running. It’s an easy oversight, but turning off the water supply completely will save you from soggy disasters.
Over-tightening Connections
Yes, it bears repeating. Over-tightening isn’t just a bad habit; it can cause irreparable damage to the filter or your shower arm. Keep it firm, not forceful.
Why Water Quality Matters for Your Skin and Hair
Alright, let’s get real. We all want that soft, smooth skin and luscious hair, but sometimes, the water coming out of our showerheads feels more like a nightmare than a beauty treatment. Here’s why the water you shower with matters more than you think:
Chlorine Strips Your Skin’s Natural Oils
Many municipal water systems add chlorine to disinfect the water. While chlorine’s great for killing bacteria, it’s not so kind to your skin and hair. Over time, it strips away natural oils from your skin, leading to dryness and irritation. Say goodbye to smooth, hydrated skin!
Hard Water Causes Buildup
Hard water contains high levels of minerals like calcium and magnesium. These minerals can create a nasty buildup on your skin and scalp, clogging pores, and leaving your hair looking dull. You may also notice soap scum that just won’t budge. Gross, right? A shower filter reduces these minerals, giving you a fresher shower experience.
Sensitive Skin and Allergies
If you have sensitive skin or conditions like eczema, psoriasis, or acne, chlorine and other chemicals in your water can irritate your skin. In fact, some people even notice flare-ups getting worse after a hot shower. A shower filter helps reduce those skin reactions by blocking out chemicals.
Hair Care 101: Why Clean Water = Healthier Hair
Color-treated or dry hair can get especially damaged by harsh water. Chlorine can cause your hair color to fade faster, and hard water leads to mineral buildup that makes your hair feel stiff, tangled, or weighed down. No one wants to look like they’ve been stuck in a wind tunnel, right?
How to Choose the Right Shower Filter for Your Needs
Okay, so now that you’re totally on board with shower filters, how do you choose the one that’s actually right for you? There are a few things to keep in mind:
Know Your Water Quality
If you’re in a city with hard water, you’ll want a filter that focuses on removing minerals. If your water smells like a pool, it’s chlorine that you want to filter out. Some filters can handle both, but you’ll want to know what’s in your water first to avoid overpaying for a product that’s more than you need.
Type of Filter
There are two main types of filters: Inline filters (which sit between the shower arm and your showerhead) and filtered showerheads (which come with the filter already built-in). Both work well, but if you prefer not to mess with your existing showerhead, a filtered showerhead might be your best bet.
Multiple Filtration Stages
Want a bit of extra peace of mind? Look for filters that have multiple stages of filtration. These typically involve a combination of activated carbon, KDF (Kinetic Degradation Fluxion), and other media that work together to trap chlorine, chemicals, and minerals. More stages = more thorough filtration.
Budget
Shower filters come in all price ranges. On the lower end, you’ll find basic filters that remove chlorine and some minerals. Higher-end models can handle hard water and other impurities. Just be sure to balance your budget with your needs. You don’t need to buy the fanciest option, but don’t go too cheap either—quality matters here.
Frequently Asked Questions
1. How often should I replace my shower filter cartridge?
Every 6 months, or sooner if your water is extra funky.
2. Can I use a shower filter with low water pressure?
Yes, but go for a model specifically designed for low pressure. Some filters can restrict flow.
3. Do shower filters really help with hard water?
Heck yes. They don’t “soften” it like a full-home system, but they do reduce scale and mineral buildup.
4. Is installation reversible?
Yep. Renting? No worries. Just unscrew everything and take it with you. Landlord = happy.
Final Words
Installing a shower filter isn’t just a DIY win—it’s a skin, hair, and sanity saver. You don’t need a plumber or a YouTube marathon to get it done. Just follow these steps, trust your instincts, and don’t be afraid to get a little hands-on.
Next time your shower feels more like a spa and less like a chemical rinse, you’ll know you nailed it. Now go on, treat yourself to a long, clean shower—you earned it. 🙂
Still here? Go install that filter. You got this.